 see
see Overview
 Customer Stories
 Benefits
 How in5 Works
 Interactive Features
 Bypass the App Store
 Acknowledgements
 learn
learn Video Tutorials & Sample Files
 Digital Publishing Course
 Live Training
 Newsletter
 YouTube Channel
 Downloadable Guides
 get
get buy
buy Compare Plans
 help
help All Support Options
 Documentation
 Q & A Forum
 Knowledge Base
 Scripting API
 Contact Ajar
 login
loginin5 Help Documentation
Introduction
in5 converts Adobe® InDesign® layouts into an open format known as HTML5. Because the output is in an open format, the files that are produced are yours to adjust and post wherever you like. There are no restrictions or monthly fees required to continue using your files.
Who can use in5?
in5 is made with the designer in mind. The HTML and (reflowable) EPUB exporters built into InDesign do not maintain the look of the InDesign layout. in5 creates an exported product with a fidelity similar to the old InDesign Flash (SWF) or PDF export, but in an open format that can be viewed in any modern browser, including on mobile devices.
What do I do with the files that in5 generates?
The output created by in5 is essentially a website. An index.html file and an assets folder are generated when in5 is run. If you’d like to post your site to the web, all you have to do is copy the index.html file and the assets folder to a web directory (using an FTP client such as FileZilla).
However, a website is not the only potential destination for in5 files. The files can packaged easily into an app using a product like Adobe® PhoneGap® or Adobe® PhoneGap® Build.
in5 can directly export to iPad, iPhone, and Android Web Apps, with no modification required (no need to go through the App Store)!
Under-the-Hood Features
The in5 exporter provides several options in the export dialog box, but there are also several features underneath the hood that help create solid output. This section of the documentation covers some of the features that are not readily visible on the surface.
Measurement Units
The basic unit of measurement on the web is the pixel. When a document uses another measurement format (such as picas, inches, millimeters, etc.), in5 automatically converts those units to pixels. Thus, there is no need to convert a document to another format before using in5.
Colors
Colors, Swatches, and Tints are automatically converted to RGB hex values, no matter which type of color space is being used (CMYK, RGB, or Lab). Tint values are calculated using the existing color space, so the hex color closely matches the look of the color in InDesign.
Accessibility
Alt text, an important component in accessibility on the web, is collected from the document in many forms. Button names from the Buttons panel are used, script labels are used (when available), and Alt text from the Object Export Options is used (when available). When textframes are rendered as images and no Alt text is provided using the options listed above, in5 will use text from the textframe as Alt text.
Additional options (custom tags, ARIA roles, screen reader visibility, skip links) can be configured using the Accessibility widget. More info on Interactive Widgets below.
Audio and Video
For movies, InDesign supports mp4 movies formatted with H.264 encoding. All common browsers now support this standard, but if you want to include backup formats, in5 also searches in the same folder for webm and ogv movies with the same name (in order to support additional browsers).
Animation
in5 supports native animation and sequenced animation created using the Animation and Timing Panels, respectively. The animation created with InDesign is translated into CSS in the output. Many of the default presets found in the Animation panel are supported by in5. However, presets that rely on blur effects (like Smoke) or complex motion paths (like Wave) cannot be effectively translated into CSS and thus are not supported by in5. For a list of browsers that support CSS animation, visit http://caniuse.com/#feat=css-animation.
Embedded HTML
InDesign CS6 (or higher) allows pasting of HTML code into InDesign (such as code copied from YouTube, Vimeo, or Google Maps). in5 automatically reads and includes this embedded HTML.
Overlays (DPS/AEM Mobile)
The (Folio) Overlays are supported and have effectively been replaced with improvement within in5 3.3 and later (under in5 > Interactive Widgets).
Widgets
in5 also includes Interactive Widgets (available from the in5 menu). These widgets let you easily create interactivity from existing InDesign objects with just a few clicks. Widgets include 3D Flip Cards, Form Element Data, the Mobile Article Explorer, Audio, Video, Hyperlink, Image Sequence, Slideshow, Pan & Zoom, Web Content, Scrolling Frames, Fixed Position Element, and Parallax Background.
Interactivity
InDesign also offers many ways to add links to a document: with buttons, using the Hyperlinks panel, or by creating a Table of Contents. All of these linking methods are supported by in5.
Button (Rollover and Click) States are also supported.
Form elements and most actions the can be applied within the Buttons and Forms panel are supported by in5. For an updated listed of all InDesign interactive features supported by in5, see http://ajarproductions.com/pages/products/in5/features.php.
Build Wizards
Also in the in5 menu, are the Build Wizards, which let you easily create Slideshows, menus, and pop-ups (interactivity included). There’s also a Magic Layout Builder for quickly building Alternate Layouts (which can be used for Responsive Layouts).
Installation
Double-click the installer that matches your operating system (Windows or Mac) and follow the onscreen instructions (additional instructions available in the README.txt file). Once installed, restart InDesign if it is open.
As of version 3.5, you can use the Easy Export Wizard (found in the in5 menu). This is a simple way to export that lets you easily create multiple different types of output (e.g., digital magazines, flipbooks, websites, app, presentations, etc).
To export an InDesign document to HTML5 with full control over all options, choose in5 > Export HTML5 with in5, which will open the in5 export dialog. Click OK to export the document (the options inside the dialog are detailed in the paragraphs that follow).
In addition to the export option, in5 adds a Mark as Thumbnail option to the Object menu and the context-click (aka right-click) menu. Thumbnails can be used to create portfolios or photo galleries. When an image that is imported into InDesign, then scaled down and cropped by adjusting the object’s frame boundaries, is marked as a Thumbnail, in5 will create a link to the original (uncropped, unscaled) image that was initially imported into InDesign. When the Thumbnail image is clicked or touched in the HTML output it will link to the larger image. When an image that has been marked as a Thumbnail has been selected, the menu item will appear with a checkmark. Selecting Mark as Thumbnail will unmark the object, and the object will no longer be treated as a thumbnail (and thus the checkmark will no longer appear next to the menu item).
The in5 Export Dialog
The export dialog allows for customization of the HTML output.
Basic
The Basic section includes settings that will be relevant to nearly every document that is exported using in5.
Title
The title text will appear at the top of the web browser and will appear in search engine results. This field will default to the title within the InDesign document’s metadata (if available), or to the name of the document (minus the .indd file extension).
Destination Folder
The destination folder determines the location where the HTML assets will be exported. By default, the destination folder is set to a folder named html5_output that resides in the same folder with the current InDesign document.
Export Range
The export range allows you to choose All Pages, a single alternate layout (if any are present), or a Custom range. When Custom is selected, a text input appears. This field supports the common InDesign print/export conventions. For alternate layouts, type the layout name followed by a colon, and then the page number(s) e.g., “iPad H:1”. If using section numbering, type the section prefix in front of the number(s), e.g. “a1”. You can also type a plus sign (+) followed by the absolute page number. In addition to these conventions, you can also type “last” or “end” to represent the last page in the document, e.g. “+2-end”.
As of in5 v3.6, in5 can also export Responsive Layouts from Alternate Layouts that you have created in InDesign. This feature requires a Gold license, and the Alternate Layouts must have matching pages counts (and differing page sizes). When these conditions are met the Responsive Layouts option will appear in the Range menu. When selected, in5 will export a responsive version of your document that changes pages based on the size (or orientation) of the window. The Easy Export Wizard will automatically detect Responsive Layouts and apply them when possible.
As of v3.7, you can also type “Responsive:” to export a responsive selection of page. E.g., “Responsive:1-3” will export the first three pages from all layouts as if you’d choosen Responsive Layouts but only had 3 pages in each layout.
Page Format
The page format determines how the pages will be displayed in HTML. There are 8 page format options:
- Slider (Horizontal)
- Slider (Vertical)
- Slider (Fade In)
- Borderless Page Scroll (Vertical)
- Continous Scroll (Vertical)
- Continous Scroll (Horizontal)
- Flipbook with Page Peel
- Liquid
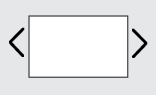
The Slider formats mask the pages inside a viewfinder, so that only one page is viewable at a time. The pages then slide horizontally or vertically, or they cross-fade during navigation. Pages can be navigated using built-in arrows or using custom navigation built in InDesign.
The Borderless Page Scroll format displays your document with no borders, spacing, or shadows between pages. This format is ideal for creating a single-page scrolling website. You can vary page heights and using InDesign’s Page Tool and use On Page Load animations to create scroll-triggered animations.

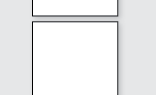
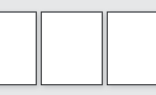
The Continous Scroll formats display as many pages as the browser window will allow in a manner similar to the Adobe Reader or Microsoft Word’s page layout format. The viewer navigates through the pages using the browser’s built-in scrolling (or with custom navigation that has been added in InDesign). The Continuous Scroll format supports variable page sizes.
The Flipbook with Page Peel format makes the output looks like a physical book or magazine by allowing the reader to “turn” pages from the corners.

The Liquid format fills the browser window regardless of size, based on options set within the Liquid Layout panel of InDesign CS6/CC. In versions prior to CS6, objects are simply scaled up or down with the browser window. For more on Liquid Layout options see http://helpx.adobe.com/indesign/using/alternate-layouts-liquid-layouts.html.
If you want your layout scale proportionally to the browser window (and not have to set up Liquid Layout rules), you should use the Desktop Scaling option in the Advanced section, rather than the Liquid format.
Note that either the Liquid format or Desktop Scaling can be applied in conjunction with Responsive Layouts to create a truly responsive experience that looks great on all devices.
Navigation
There are several additional navigation options. The Enable Swipe Navigation and Show Back/Next Arrows options are available for the Slider and Liquid page formats.
Swipe Navigation allow users with a touch screen to move through the pages with swipe gestures (also works with mouse interaction). The available gestures are vertical or horizontal, depending on the exact page format selected.
in5 supports many types of custom navigation that can be created within InDesign (e.g. using buttons or hyperlinks). The Show Back/Next Arrows option offer an easy way to include navigation without needing to build any user interface elements in InDesign.
A Lightbox opens new content on top of the existing content so the viewer does not have to leave the current page. Open External Links in Lightbox allows a user to visit external links in a Lightbox window.
Open Thumbnails in Lightbox opens larger versions of any images that have been marked as Thumbnails. This option can be used to create portfolios or photo galleries. An image can be imported into InDesign, then scaled down and cropped by adjusting the object’s frame boundaries. Choosing Mark as Thumbnail in the Object or context (right-click) menu of InDesign will cause in5 to treat the object as a Thumbnail. in5 will create a link to the original (uncropped, unscaled) image that was imported into InDesign. When the Thumbnail image is clicked or touched in the HTML output (and Open Thumbnails in Lightbox has been selected), the larger image will be revealed in a Lightbox.
Text Rendering
The Text Rendering options affect how InDesign textframes will be exported to HTML.
Rendering the text as Images (the default) preserves the exact appearence of each textframe—no matter what fonts the viewer has installed—by rendering the textframes as PNG files.
HTML with Web-Safe Fallback Fonts will translate InDesign copy and styles into HTML and CSS. Unless fonts are chosen carefully in InDesign, it’s likely that the viewers will not have all of the fonts from the document installed. The “Fallback Fonts” option analyzes the characteristics (when possible) of fonts used in InDesign to determine suitable back-up fonts that will be displayed in cases when the the exact font is not available. For more on web-safe fonts, see: http://www.w3schools.com/cssref/css_websafe_fonts.asp.
HTML with Local Font Embedding (when possible) generates web-safe fallbacks, but it also copies Open Type (OTF) and True Type (TTF) fonts from the local machine and embeds them into the CSS using the @font-face rule. This option should be used with caution, because many fonts are not licensed to be embedded freely on the web. For more information, please consult this page: http://www.adobe.com/type/browser/legal/pdfs/faq.html.
SVG (preserves appearance + scalable) renders the text as Scalable Vector Graphics. This option maintains the appearance of text by converting the characters to vector graphics that scale well for Liquid Layouts or HD (retina) displays.
Output
The Output drop-down options determine the output format.
The default option of Web renders the output as a webpage.
The Multi-page web option exports an HTML file for each page in the InDesign document (rather than a single index.html file). An index.html file is also created and redirect to the first page.
The iPad Web App option creates a special version of a webpage that is designed to be added to an iPad Home screen. Special instructions direct viewers to visit the URL on their iPad and save the page to their Home screen. A custom icon for the Home screen can be added in the Advanced section of the in5 dialog. A Web App functions very much like a normal iPad app, but does not need to be submitted to the App Store. Viewers can simply visit a webpage (where the output files have been uploaded) to install.
The iPhone Web App is similar to the iPad Web App except that it targets the iPhone.
The Android Web App is similar to the iPad Web App except that it targets the Android devices. This format is experimental. As of the time of this writing, the “add to home screen” functionality is only available in a beta version of Chrome, and is not as full-featured as the iPhone and iPad apps. For more information, visit https://developer.chrome.com/multidevice/android/installtohomescreen.
The Multi-device Web App functions like the iPad, iPhone, and Android Web Apps combined into one format. The outputted “app” detects the platform and displays the correct prompts for the viewer’s device. If the viewer is not on one of these mobile platforms, a different prompt is displayed.
The Google Ad option packages the file for upload as an HTML5 ad into Google Ads. It automatically confirms to Google’s packaging rules by converting hyperlinks into clickTags, adding the necessary meta tag, and removing references to localStorage.
The Baker Framework (HPUB) option exports the files in a format ready to be used by the Baker Framework. Rather than output a single HTML file with all of the pages inside, this option creates an HTML file for each page in the InDesign document. This option all generates an index.html file with thumbnail images for each page, as well a book.json file to be used as a manifest for the book itself. The output can then be compiled into an iPhone or iPad app, or submitted to Apple Newsstand. For more on the Baker Framework, visit http://bakerframework.com.
The Clear Previously Exported Files option deletes any existing files within the assets directory of the Destination Folder. This ensures that if the export has been run multiple times, unused files are discarded in order to save file space when the files are uploaded to a web server or packaged as an app.
The Display in5 Link in Footer option adds a link to the in5 website in the footer of the HTML page. Leaving this option checked (the default) helps potential users discover our product and is much appreciated!
Backgrounds
The Backgrounds section includes options that allow you to customize the appearance of the page and document backgrounds.
Background Color
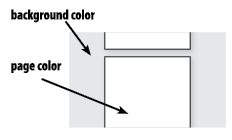
Background Color sets the body color of the HTML.
Background Image
A custom image (JPG, GIF, PNG, or SVG) can be selected as a background.
Background Image Position
This determines the horizontal and vertical positioning of the background image.
Background Image Size
This controls how the image is scaled.
- The auto option is the default and does not scale the background image.
- The cover option scales the background image to be as large as possible so that the background area is completely covered by the image (some parts of the image may not be in view within the background positioning area).
- The contain option scales the image to the largest size such that both its width and its height can fit inside the content area.
Repeat Background Image
The background can be repeated (“tiled”) horizontally on the x axis, vertically the y axix, or both.
Page Color
Page Color sets the background color of each page in the layout.
Page Image
A custom image (JPG, GIF, PNG, or SVG) can be selected as the page background.
Page Image Position
This determines the horizontal and vertical positioning of the page background image.
Page Image Size
This controls how the image is scaled.
- The auto option is the default and does not scale the page image.
- The cover option scales the page background image to be as large as possible so that the page area is completely covered by the image (some parts of the image may not be in view within the page positioning area).
- The contain option scales the image to the largest size such that both its width and its height can fit inside the page area.
Repeat Page Image
The page image can be repeated (“tiled”) on the x axis (horizontally), the y axix (vertically), or both.
SEO & Meta
SEO stands for Search Engine Optimization. The SEO & Meta section provides options to make the output more available to search engines on the web, as well as to add important metadata. Inclusion of metadata in the HTML makes it easier for a search engine to locate and index. Thus, people can more easily find your website with search terms. The fields listed below are automatically copied from the InDesign document’s metadata (if available).
Description
The Description is a basic outline of the content and purpose of the web page. This field is limited to 155 characters to ensure maximum compliance with search engines.
Keywords
Keywords are comma-separated words that could be used to find your page in a search. The Auto button can be used to grab the most repeated words found in the document.
Author
The Author field can be used to include someone’s name with the web page, e.g., for copyright or search purposes.
Book URL (used with HPUBs)
The Book URL field is available as a unique identifer for a Baker Framework book. For more on the Book URL, see https://github.com/Simbul/baker/wiki/Book-protocol.
Amazon Web App Verification Key
in5 output can be deployed directly into the Amazon App Store. Part of the submission process to the App Store involves creating a manifest file with a verification key. Instead of creating the manifest manually, you can simply paste your verification into the Amazon Web App Verification Key field within the in5 dialog and in5 will generate the manifest for you. For more on Amazon Web Apps, visit https://developer.amazon.com/sdk/webapps.html.
Version
This field is used to add a version number to the manifest file that is generated for an Amazon Web App.
Analytics & Sharing
This section lets you easily include Google Analytics tracking and sharing buttons for social networks.
Analytics
You can learn more about the behavior of your users/viewers by tracking analytics to see statistics, such as which pages are viewed, for how long, and where people leave your site/app.
Analytics can be enabled by entering a Google Analytics Tracking ID. Once the output files are posted to a server and viewed online, they will automatically send tracking data to the corresponding Google Analytics account. You can also include an App ID (optional). You can track specific events by selecting from the list of items shown under the Track heading:
- Pages - selecting this option tracks different pages viewed within the document.
- Use Bookmark Names - selecting this option logs pages by associated Bookmark names, rather than using the page numbers.
- Button Clicks - selecting this option tracks every button that is clicked based on the button name from InDesign.
- Hyperlink Clicks - selecting this option tracks every hyperlink that is clicked based on the URL.
- Audio/Video Playback - selecting this option tracks each time audio or video is played.
- PDF Downloads - selecting this option tracks clicks on the PDF Viewer Display option.
- Social Sharing - selecting this option tracks when social sharing buttons are clicked (see below for enabling social sharing buttons).
in5 automatically tracks both app- and web-based events. Sign up for Google Analytics for free and learn more at http://www.google.com/analytics/
Social Sharing
By selecting any of the social networks shown in the Sharing list (Twitter, Facebook, LinkedIn), sharing buttons will automatically be shown in the output.
The Sharing Widget Position position menu lets you control the position of the sharing buttons in the window (left, right, top, bottom).
The Custom URL (optional - for apps & offline content) option lets you add a custom URL to appear when your content is shared on a social network. If this field is left blank (the default), then the current web address is shared.
Note: Your output content must be posted to a web server for the content to properly post to social network sites.
Viewer Display
The section lets control display options in the HTML output. These options are only available to subscribers of the Pro (or higher) plans.
Control Frame options
When selected, the options appear as a “control frame” at the bottom of the screen in the output.
The Frame Color lets you customize the color of the Control Frame.
The Display Logo lets you attach a logo to appear on the left side of the Control Frame.
The Document title displays the title assigned in the Basic section of the dialog.
The Current page / total pages shows the numerical progress as the reader navigates.
The Jump to TOC button takes the viewer back to the Table of Content page number.
The TOC page number is auto-populated by in5 if a Table of Contents is found. This number refers to the page in the output, not the position in the InDesign document.
The Page thumbnails button opens a thumbnail viewer will click-able images of every page.
The Zoom in/out buttons control the zoom of the outputted content.
The Fullscreen button launches the layout in fullscreen mode (when available).
The PDF download button links to a PDF file. You can select a PDF from your local system, or leave the field blank and in5 will automatically generate a PDF from the current InDesign file.
Loading & Progress
This section controls options related to content loading and reader progress.
The Show loading bar while content loads option lets your reader know that content is still loading. Deselecting this option hides the loading bar.
The Loading text to display lets you easily customize the text in the loading bar (i.e., instead of “loading content...”). This can be used to show text in your target language.
The Page progress bar shows a color bar indicating how far the reader is in the document.
The Progress Color lets you customized the color of the Page progress bar.
Resources
The Resources section makes it possible to customize the look of the output, as well as extend the functionality. Files added as resources will appear in the final output.
CSS
CSS files can be added or removed using the plus (+) and minus (-) buttons, respectively. These files will be associated with the final HTML in the order they appear in the list (drag an item to adjust its position in the list). Use the Append to Existing checkbox to add the code within the listed files to a CSS file that is already included in the output, and thus reduce the number of files in the final output.
JavaScript
JavaScript files can be added or removed using the plus (+) and minus (-) buttons, respectively. These files will be associated with the final HTML in the order they appear in the list (drag an item to adjust its position in the list). Use the Append to Existing checkbox to add the code within the listed files to a JavaScript file that is already included in the output, and thus reduce the number of files in the final output.
Folder
The Folder option can be used to attach a set of resources that are referenced as hyperlinks in your document, or as resources referenced in attached CSS or JavaScript files. For example, perhaps you’ve created a custom navigational menu using additional CSS and JavaScript. Images needed for the menu can be put in a single folder and attached using the Folder field. This folder is moved to the assets/resources/ folder in the output. The paths to the images from CSS and JavaScript in the final output would then be ../assets/resources and the path from any attached HTML would be assets/resources/.
HTML to Append
This HTML to Append field adds content from a selected HTML file to end of the output HTML file(s). For example, this option can be used to attached a custom footer, such as a copyright notice, that you like to appear in a single, persistent location (rather than on every page from the document). This HTML can then be styled and manipulated using CSS and JavaScript resources.
Advanced
The Advanced section provides several additional options.
Icon
When exporting to the web, a custom icon (.png format) can be added as a favicon (the small icon that appears next to the URL in the browser (32x32 pixels recommended). When exporting using one of the Web App Output Formats, the icon is used as the app icon on the home screen (129x129 pixels recommended). A default icon is provided by in5 if no custom icon is added for a Web App.
Image Quality
The Image Quality menu options determine the quality of the images produced during the export process.
- Standard - Uses the default in5 settings (typically 72ppi PNGs, 150ppi when using the Liquid Page Format, or JPG is used when the source file is a JPG). Source images are automatically used when the source image is a GIF and the frame matches the dimensions of the image (to allow for animated GIFs).
- Use Source Image (when available) - Copies the source image (i.e., the one shown in the Links panel in InDesign) directly to the output instead of re-rendering. If the source image is not available, a new image is rendered with the default settings.
- Use Object Export Settings - Allows for custom settings (resolution and image format) on each page item. Uses the Custom Rasterization settings from the Object > Object Export Options... dialog (in the EPUB and HTML section). PNG and JPG are supported. GIFs are converted to PNGs.
- High Definition - Automatically exports all images at 144ppi.
- High Definition - Text Frames Only - Exports text frames (or anchored object when rendering text as HTML) at 144ppi and uses the standard export for all other items.
Image Optimization (to reduce file size)
This option shrinks the images (SVG, PNG, and JPG) created by InDesign to reduce your file size and speed up your loading time. There are two modes Standard and Enhanced. Stanard is available on Pro (or higher) plans and Enhanced is available on Gold (or higher) plans. The Enhanced optimization takes longer in order to shrink the files as much as possible without a noticeable drop in quality. Enhanced mode also searches for duplicate images and consolidates them to shrink the size of the output even further.
Mobile Device Viewport Zoom
Mobile web browsers render web pages in a virtual “window” known as the viewport. The viewport metatag in HTML5 makes it possible to “zoom” a device’s viewport to a certain level. in5 offers the following viewport options:
- Let in5 Choose - in5 will automatically choose the Viewport Zoom setting based on the Page Format used to ensure that the layout fills the device’s viewport. This setting will set the zoom to 100% when the Liquid Page Format is used, and will zoom to the page width in all other cases.
- Use Desktop Scaling - Applies the chosen setting from Desktop Scaling to mobile devices. This is the only way to scale the height, as well as both the height and width. The Viewport can only scale to the width.
- Let Device Choose - No viewport setting is added and the mobile device estimates the best sizing for the content.
- Zoom to Device Width - Zooms the device display so that the content fills the width of the device.
- Zoom to Page Width - Zooms the device to match the width of a single page.
- Force 100% Scale - Ensures that the device will not zoom in or out by default.
For more information on the viewport metatag, see https://developer.mozilla.org/en-US/docs/Web/HTML/Viewport_meta_tag.
Desktop Scaling
Scales your layout (proportionally) to the browser window.
- Best fit - Fills the browser window as much as possible while still maintaining the layout.
- Fill Width - Fills the width of the browser. The height of content may exceed the window.
- Fill Height - Fills the height of the browser. The width of content may exceed the window.
Audio
Show Audio Controls generates a standard set of playback controls to start, stop, skip ahead, and adjust volume. The minimum width of the controls is wider than the 60-pixel square that is automatically generated by InDesign when audio is placed. If Show Audio Controls is not selected, the poster image (by default in InDesign, a speaker icon) can be clicked or touched to start and stop the audio.
Application Cache (Offline Viewing)
The Application Cache is a feature of modern web browsers that stores content such that it can be viewed without internet access. The Cache All option will generate a manifest file that includes all of the files generated by in5 (so that the content can be viewed offline).
Apple’s iOS 6 browser for the iPad and iPhone allows 25mb of application cache by default, but many other browsers limit the application cache to 5mb.
The Cache Non-Media Files Only option adds only non-media (files that are not audio or video, which are generally larger in size) to the manifest. This option can be used to cache essential files without exceeding the application cache file size limit.
Advanced Rendering
The Advanced Rendering options provide additional ways to direct how in5 converts InDesign content to HTML.
The Make Overset Text Scrollable adds scrollbars (or touch-scrolling on iOS devices) when the HTML text exceeds the boundaries of the textframes. When this option is not checked, the height of the text automatically expands the height of the textframe (the default HTML behavior). The Folio Overlay panel can also be used to add scrolling to individual textframes.
Render Rectangles as CSS (when possible) renders rectangles as <div> tags and CSS, rather than as PNG images. This option can reduce the file size to some extent and fewer files need be requested on a server.
Lazy Load Images will only load images on the current page and neighboring pages, rather than loading all of the images in the document right away. Turning this option on can dramatically reduce the load time in the browser, especially for long documents.
Render Groups As Images will treat groups as images, rather than rendering the content inside of the group. When this option is checked, some items can be strategically rendered as images to preserve appearance, while other items are still rendered as pure HTML. This can be especially useful for maintaining the appearance of items with complex blending modes or effects that are not well-supported in HTML.
When an object spans across multiple pages (horizontally) in a spread, InDesign still treats that object as if it belongs to a single page. By checking Allow Page Items to Span Across Pages within Spreads, in5 searches the spread for other object that could be on the page so that the output will match the appearance of the InDesign spread.
The Include Hidden Layers option makes all layers visible in the outputted HTML.
Info
The Info section contains important information about the in5 extension itself. The Info section is used to check for updates and enter a serial number to activate in5.
The Info features can also be accessed independent of export via in5 > Info and Updates...
License
Click the Activate button to activate in5 (an internet connection is required for this step).
Updates
Updates can be found by selecting the Check now button. If updates are available, a download link and a list of changes will be displayed in the Updates field.


